 English
 简体中文
简体中文
 ru
ru
 es
es

How to Replace an Excavator Solenoid Valve: Step-by-Step Guide, Safety & Tools
The hydraulic solenoid valve is a critical component in your excavator’s control system.
Responsible for directing fluid flow to execute actions—such as shifting travel speeds, engaging the safety lock, or controlling hydraulic attachments—a failing solenoid valve can lead to sluggish performance, stuck movements, or total system downtime.
Replacing a faulty solenoid valve is a straightforward task if you follow the right procedures. In this guide, we will walk you through the essential tools required, vital safety precautions, and a step-by-step replacement process to get your machine back to work safely and efficiently.

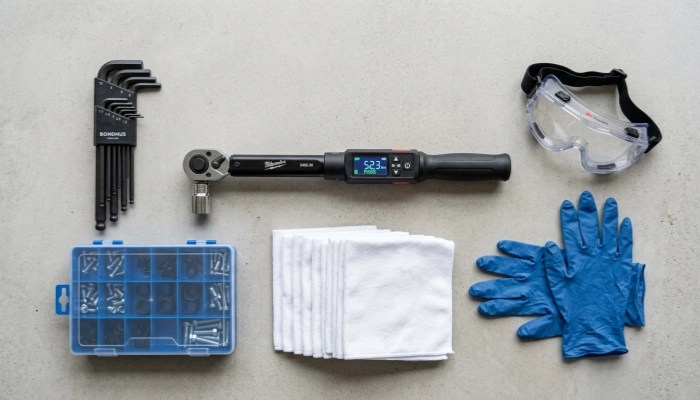
1. Tools & Equipment Required
Before starting the replacement, prepare the following tools and supplies:
- Basic Hand Tools: Socket set, combination wrenches, and screwdrivers.
- Cleaning Supplies: Lint-free shop towels, brake cleaner/degreaser, and a soft brush.
- Replacement Parts:
- New Excavator Solenoid Valve (ensure correct voltage and spool configuration).
- High-temp, oil-resistant Hydraulic O-Ring Seal Kit.
- Hydraulic Maintenance Items: Fluid catchment pan, clean hydraulic oil for pre-lubrication, and a torque wrench.
- PPE (Personal Protective Equipment): Safety glasses, heavy-duty nitrile/work gloves, and steel-toe boots.
2. Crucial Safety Precautions Before Starting
Working on heavy machinery hydraulics presents risks from residual pressure, hot fluid, and accidental component movement. Always perform the following safety checks before unscrewing any fittings:
- Park on Level Ground: Lower the boom, arm, bucket, and dozer blade completely to the ground.
- Shut Down the Engine & Relieve Hydraulic Pressure:
- Turn off the ignition.
- Turn the key switch back to the “ON” position (without starting the engine) and cycle all hydraulic levers/joysticks in every direction 10–15 times to purge residual pressure from the accumulator and pilot lines.
- Engage the Hydraulic Safety Lock: Move the safety lockout lever to the locked position.
- Disconnect the Battery: Disconnect the negative (-) battery terminal to prevent electrical shocks or accidental short-circuits while disconnecting the solenoid wiring harness.
- Allow the Hydraulics to Cool: Hot hydraulic fluid can cause severe burns. Wait until the valve block is warm or cool to the touch.
3. Step-by-Step Solenoid Valve Replacement Guide
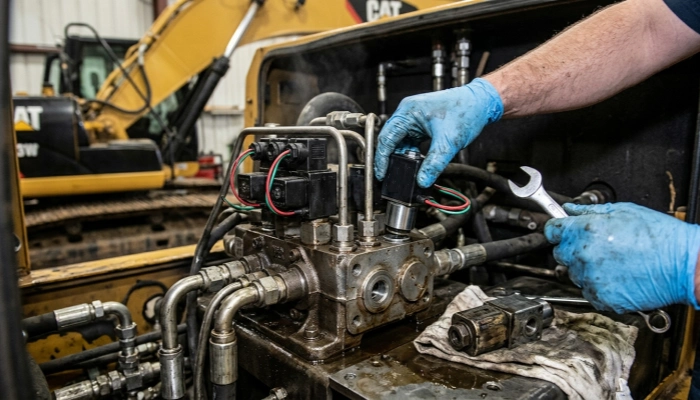
Step 1: Locate the Solenoid Valve Block
Open the main pump door or side maintenance compartment to access the hydraulic valve manifold. Refer to your machine’s service manual or check the wiring harness labels to identify the specific valve (e.g., travel speed solenoid, pilot lock solenoid, or main pump proportional valve).
Step 2: Clean the Work Area
Dust and dirt are the primary enemies of hydraulic systems. Spray the solenoid valve and surrounding manifold with degreaser and wipe away all debris. Never open a hydraulic line until the exterior surface is completely clean.
Step 3: Disconnect the Wiring Harness
Unplug the electrical connector from the solenoid coil. Inspect the plug for corrosion, burnt pins, or damaged wire insulation.
Tip: If the electrical plug or wiring is damaged, consider replacing the Solenoid Valve Wiring Harness & Waterproof Connector alongside the valve to prevent future electrical shorts.
Step 4: Remove the Defective Solenoid Valve
- Place a fluid catchment tray beneath the valve block.
- Using the appropriate socket or wrench, loosen the mounting bolts holding the solenoid valve to the manifold block.
- Carefully pull the valve straight out. Small amounts of hydraulic oil will drain out; wipe it clean immediately with a lint-free towel.
Step 5: Prepare the New Valve & Install O-Rings
- Unpack your new valve and compare it with the old one to verify port alignment, mounting holes, and voltage rating (typically 12V or 24V DC).
- Coat the new rubber seals with fresh, clean hydraulic oil. Carefully seat the O-rings and backup rings into their respective grooves on the valve body.
Note: Never reuse old O-rings. Always install new, oil-resistant seals from a quality Solenoid Valve Seal Kit.
Step 6: Install the New Solenoid Valve
- Insert the new solenoid valve smoothly into the manifold port, ensuring the O-rings stay in place and are not pinched or twisted.
- Hand-tighten the mounting bolts first.
- Use a torque wrench to tighten the bolts evenly in a cross pattern to the manufacturer’s recommended specification (over-tightening can warp the valve body and cause the inner spool to stick).
Step 7: Reconnect Electrical and Power On
- Reattach the electrical connector to the solenoid coil until it clicks securely into place.
- Reconnect the battery’s negative terminal.
4. Post-Installation Testing & Air Bleeding
- Check Hydraulic Oil Level: Top off the hydraulic tank if any fluid was lost during replacement.
- Start the Machine: Start the engine and run it at low idle for 3–5 minutes. Inspect the newly installed solenoid valve for any signs of external hydraulic oil leaks.
- Cycle the Function: Operate the specific function controlled by the new valve (e.g., toggle the travel speed switch or cycle the attachment pedal) several times at low power to bleed trapped air out of the pilot system.
- Final Check: Check for smooth operation, ensure no error codes pop up on the display monitor, and confirm there are no leaks under full operating pressure.
Need Premium Replacement Solenoid Valves for Your Excavator?
Prevent unexpected machine breakdown by choosing high-durability hydraulic components. Browse our extensive inventory of direct-fit OEM & aftermarket hydraulic valves:
- Shop Full Solenoid Valve Catalog — Compatible with CAT, JCB, Komatsu, Bobcat, Kobelco, Hitachi, and John Deere.
- Shop Relief Valve
- Shop Universal Solenoid Valve Coils (12V / 24V DC)
Have questions about choosing the right part number or cross-referencing your valve? Contact our technical support team today for expert assistance!
